Seller HUB

Selling on BMR:

Key steps to a successful sale.

SUBMIT

Pick a listing type and submit your project.

  • A basic listing is free for a limited time after launch.
  • Pro listings provide added services including photography.
  • Custom project listings are reserved for collections and projects that require additional resources.
DOCUMENT

Prepare your listing. Collect and document all aspects of your project including:

  • Books, records, old photos, receipts.
  • Detailed photography and video.
  • Removal of any existing listing or advertisements for the project.
GO LIVE!

Once you have approved the BMR listing and a start date has been scheduled, it’s time to jump in.

  • Participate in the auction by responding to comments and questions.
  • Upload additional images or videos.
  • Watch for direct emails messages and respond as quickly as possible.

Photo & Video Guide:

An image is worth a thousand words.

Green Check

Beginner’s Tips for Cell Phone Photography:

Set your camera to 4:3 or 3:2 aspect ratio.

All photos should be in Landscape orientation, holding your phone sideways.

The less you are zoomed, the more distorted the photos will be, like on .5x zoom it has a fish eye effect. Use 1x for close up photos and try to use 2x for wider shots of the exterior if you have the room to stand back, they will be more true to size and scale.

Non-Running Projects

First steps before you do anything… CLEAN UP!:

Layer 4 copy
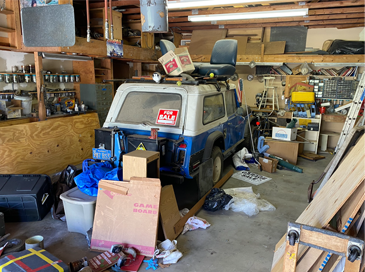
  • Clear out all movable items from in and around the vehicle. They should be completely out of the area so that they are not visible in any photos or in your way as you move around the vehicle. If they are parts for the vehicle, set them in a single area, as you will be photographing them as well.
  • Do a general cleanup of any dirt, debris, leaves, and animal droppings. The shop vac is your best friend.
  • If the vehicle has any personalizations that don’t make sense for everyone, like a homemade gun rack made out of shelving hooks, you may want to remove it. Delete things that are unsightly and detract from the overall appeal of the vehicle.
  • If the vehicle has paint that will show better with a wash, do it.
  • Air up the tires! If any tires do not hold air, it’s best to have it replaced with one that holds air, as it will be much easier to load on the trailer and will look better in photos

Video Guide

The more explicit and detailed you can be the greater your success in the sale. In contrast to a running operational vehicle a project car has lots of details hiding in the shadows. Make the potential buyer aware of all of the details and showcase them iwth video. Full motion enables the buyer to see things in a different dimention as you move in and around the subject project. Best practices to make a comprehensive collection of videos to document your project are the following:

  • It is not necessary to narrate your videos. If you feel it is important to call attention to a specific detail then narration is acceptable.
  • Remember to record in 4:3 aspect ratio and in landscape orientation. Reminder, landscape is when you hold your phone long way left to right.
  • Get full coverage of the exterior. Walk around the vehicle slowly and capture the entire project. This should be a 360 degree view of the entire exterior including both sides, front and back in addition to rooftop as best as you can. Avoid focusing on any specific details in this video. This is intended to be a broad coverage walk around. This video may be roughly 60 seconds.
  • Get full coverage of the interior. Slowly move your camera in all directions of the interior including front & back, floors, dash and under dash. Be sure to pause on any trouble areas so that the buinder can see what they are getting.
  • Get full coverage of the engine bay. Engine bays can be dark. The more light on the engine the better for this video.
  • If you have the ability to record under the venicle then do it! Move slowly, light well and add value to your project documentation.

Tell the Story:

The life your project has lived.

Every vehicle and project has lived an incredible life that you may or may not know about. If the vehicle has been in your family since it was new off of the showroom floor then you probably know everything about it. Tell its story.

  • Share anecdotes about weekend trips to the beach as a kid.
  • Was the car the family daily driver for years on end?
  • How did the vehicle serve for the years it was in service before becoming a project?
  • Who originally purchased the vehicle and why do you have it?
  • Why have you decided to sell it?

If you acquired the project and are now ready to pass it on for it to begin its next chapter then let us know some of the details:

  • Where did you get it?
  • Why did you get it or what were the circumstances that led to your acquisition of the project?
  • What were your plans for it when you purchased it?
  • What information did you get from the previous ownership?
  • Why have you decided to sell it?

Project Details:

Explain what the buyer will get and need.

Your project is likely not driving, in parts and or missing parts. Help the future owner prepare to succeed in building their future ride. To do this we have organized our site to help structure the details you have that they will need in a way that is easy to understand.

  • Tell them what they will get with your project.
  • Factory removed parts, spares, and new parts that you may have either installed or not on the project.
  • Any modifications that may have been made to the project.
  • Detail any work that has been completed or that is currently in progress. For example: You have cut out the rusted floor and have laid in a new floor pan but have not welded it into place.

In your opinion, tell the future buyer what they will need to complete the project. This should include:

  • List work that you know needs to be done in order to have a safe running and driving vehicle in a presentable condition.
  • List parts that may need to be replaced, rebuilt and or installed.

The Sales Process:

You sold your project, now what?

When your project has sold, we will email you the winning builders contact information. It is now up to you and the new builder to coordinate payment and transportation of the project.

In general, Build My Ride recommends wire transfers and cashier’s checks as the safest form of payment. If the buyer is local, for example, meeting at their local bank branch to draft a cashier’s check, withdraw the funds directly, or complete an electronic money transfer are also common practices. In each of these cases, please perform your due diligence, potentially including verifying a cashier’s check with your bank, or waiting until funds are received before releasing the project and or signing over its title.

We recommend you use a shipper of your choice. If you don’t have a preferred shipping method we are here to help. We work independently with a collection of transportation brokers and may assist in the process. If you require shipping assistance please contact us at support@buildmyride.com